• Skip to primary navigation
  • Skip to main content
  • Skip to footer

The Columbus Team | Columbus & Central Ohio Real Estate

Your source for Worthington, Dublin, Columbus & Central Ohio Real Estate Information

Let’s Chat!
614.888.6100
  • Home
  • For Sale
    • Home Search Login
    • View Our Listings
    • View Our Lease/Rentals
  • Buying
    • Ultimate Guide to Buying a Home in Columbus, Ohio
    • Customize your home search
    • Communities
    • Schools
    • Financing
    • Estimate Your Mortgage Payment
    • Building a Home
  • Selling
    • Ultimate Guide to Selling a Home in Columbus Ohio
    • Market Watch
  • Communities
  • Our Team
  • About Us
    • Why We’re Different
  • Reviews
  • Blog

Don’t Forget to Winterize Your Irrigation System

September 12, 2016 by The Columbus Team

Irrigation-Systems

Water expands as it freezes, so don’t forget to winterize your irrigation system by closing the water supply and removing all the water in the underground pipes! You can have a professional do it for a fee, or you can do it yourself for the cost of a rented compressor, either way you should understand the process.

  1. We recommend using a 10-cfm air compressor with hose. If you have a smaller compressor, consider renting one from a local tool rental place such as Rousch Hardware, or from the Tool Library.
  2. Close off the two valves to the backflow preventer. You don’t want to damage this valve, as it needs to pass inspection and keeps the municipal or county water supply safe.
  3. Connect your compressor to the sprinkler system by removing the plug on the blow-out port. Use a quick-connect adapter to connect your system to the compressor.
  4. Set the compressor to no more than 80 PSI for rigid PVC (white) or 50 PSI for flexible polyethylene (black) pipe.
  5. Turn off the water supply.
  6. Set the system timer to open a single zone and open the manual drain on the end of that zone if your system has one.
  7. Have a partner at that zone, watching the sprinkler heads. They should notify you as soon as no more water is coming out.
  8. Turn on the compressor and blow out that zone. The sprinkler head should pop up and sprinkle, stopping when the water is gone. Disconnect as soon as the zone runs dry, as plastic parts can melt inside the system without the water to keep them cool.
  9. Move on to the next zone, opening only one zone at a time and blowing it out.
  10. When you are done blowing out all the zones, repeat one more time to get any water that collected.

Properly prepared for cold weather, these automated watering systems will last for many years with few repairs. So don’t forget to winterize your irrigation system by blowing out the water and preventing damage from freezing water.

Photo Credit

Filed Under: Homeowner Info Tagged With: Cold Weather, Irrigation, Winterization

Things All First-time Landlords Need to Know

May 26, 2016 by David Glenn

things-first-time-landlords-need-to-know

Becoming a landlord is more than just buying a space and getting someone to move in. There’s a lot more to it, and it might surprise you just how much you need to take care of and be aware of before really getting into the game. To make sure you know just where to start, we’ve rounded up a number of things that all first-time landlords need to know to get up and running.

Know the Laws
Probably the most important thing to familiarize yourself with is all laws that involve landlords and tenants. In the U.S., every state has different laws so be sure to check out just what your region’s requirements are. They may seem vast but becoming well-versed in these could potentially save you a massive headache and possible massive legal fees. Most state government websites have a section that will outline the laws and regulations you should be aware of. Be sure to really study up on these so that tenants can’t find the smallest of loophole, this way you can avoid being taken to court.

Get Insurance
Unlike your home or car, you have almost no control over what a tenant might do inside your rental space. Plus, there are tons of scenarios that could happen that you can’t foresee or predict, like a pipe bursting, the furnace going out, or a natural disaster destroying the roof. To save yourself time, money and any future hassle, make sure your homeowner’s insurance covers your tenants and your rental space. Don’t skip it!

Create a Policy
Creating a policy and setting ground rules is another very important step in the process of becoming a landlord. If you don’t, don’t be surprised if your tenants start nailing holes in the walls and painting the kitchen avocado green. Many tenants won’t clean a place when they move out, or maybe ever, others may take a pet policy too far and start housing pigs. Once you create a policy, stick to it. Don’t budge for one tenant and then try to reinforce it all over again for the next. Along with creating a policy is make sure it is in writing. This will not only help you out, but your tenants too. With a policy, you can easily refer back to it when the tenant asks any questions about letting someone else move in, subletting, maintenance, or if they can pay rent entirely in quarters. Many people don’t question a policy.

Utilize Forms
Next to the policy, forms can also be a great lifesaver as a landlord. You can find ample amounts of sample contracts online. The more that you outline at the start of a contract the smoother things will run down the road. Along with a contract and policy form, maintenance and cleaning forms can also be great things to have handy. As we’ve said, people don’t often question something on paper.

Be Handy & Knowledgeable
Another big thing about being a landlord that isn’t necessarily a must, but it will definitely save you a little cash along the way is to be handy and knowledgeable. You don’t necessarily need to be an electrician, but fixing a blown fuse, unclogging a toilet or sink and other simple fixes should be on your list of skills. If you have to call a professional every time something breaks or leaks your maintenance bills are going to be out the roof and you and your tenants aren’t going to be too happy. If you’re not super handy, start reading up and studying everything you can. Plus, if you are really in the know-how but need a pro to fix something, you might be able to spot a ridiculously over-priced quote for a repair or part.

It’s a Part-time Job
Being a landlord isn’t something that you can just set off to the side and watch your invested money grow. It’s a part-time job. But it will pay off. If you stay on top of everything, that extra cash will really come in handy and not be going back into repairs or legal fees. There are many devices, apps and things out there that will be beneficial for you to employ, such as an electric submeter to keep track of utilities, a home warranty policy or even real estate software to keep track of contracts and forms. If you get to a place where the money is coming in and you’re doing pretty well, consider hiring a management company to take care of the little things. Then you can really sit back and relax.

Don’t Rent to Family or Friends
Though this one may seem small, it’s a doozy. Renting to family and friends can be a disaster, though we may not want to admit it, there are some relationships out there where a friend or family member will absolutely try to take advantage of you and play the “best friend card” and screw you over. To preserve those relationships and avoid losing money, never rent to family or friends. On top of this, don’t be afraid to be picky with just who you allow to rent out your space. It might be worth your while to let a space go empty for a month or two rather than renting to someone who could potentially destroy the place.

Contributed by David Glenn.  David Glenn is a home improvement expert with nearly 30 years experience in the industry. Now retired, he enjoys writing about real estate tips, home maintenance and DIY home repair.

Filed Under: Homeowner Info Tagged With: David Glenn, Landlord, Rentals, Tips for Landlords

Looking for Great Rec Room Ideas?

October 28, 2015 by The Columbus Team

rec-room

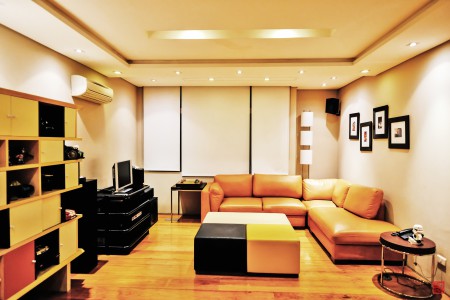
Are you looking for great rec room ideas? Search no more! We’ve collected some of the hottest trends and coolest ideas for recreation space out there. We know that while the rec room you have may not be the highlight of your home tour, it can be the heart of your home and deserves some tlc and good design!

2015 is filled with strong colors, a less-cluttered design, and many designers and homeowners are designing space around the purpose, in rec rooms that means hobbies and interests, and they are celebrating the room’s  purpose in the decor details. How do you celebrate purpose? Think board game boards as wall decor, or musical instrument storage as part of the design aesthetic.

The first thing you need to do is identify what kind of recreation you want to build your rec room around, and who will use it. From a kid’s gaming paradise or board game palace, to a media man-cave or the hottest entertainment spot on the block, a rec room can be built around your dreams for the space. Here’s a few types of rec rooms, and some gorgeous examples of what you can do with a little extra space in your home!

Adults Only Rec Rooms

Looking for an adult entertainment space, perhaps with a wet bar, pool table and a comfortable space and large screen for viewing the sporting events you love? Everydayphotos.com has some great ideas. Clean, spacious, and divided into areas set up to feature the activities you love to share with friends. A whiskey-themed man cave is featured on Pinterest, Interested in creating your own man cave? DIYhomedesignideas.com has great suggestions on choosing important features, and even how to build them into your design.

Adult Rec Rooms by Summit Luxury on Flickr

Family Central Rec Rooms

Is your idea of a rec room filled with the family? From board games to tv nights and watching favorite teams together, these housebeautiful.com ideas are for kid-friendly, parent-proud rooms filled with family fun. Looking for something simple with bright colors, easily cleaned, and ready for youngsters? Take a look at this houzz.com rec room.

Gamer’s Paradise Rec Rooms

Is there a video game addict in your home? Whether your gamer is a weekend warrior adult, or a group of gung-ho kid gamers, here are some room designs just for them from MyLRF! Looking to ease into a gamer’s grotto? Apartmenttherapy.com offers 10 great tips to doing a gamer room right.

Games Rec Rooms by Summit Luxury on Flickr

Music Room Rec Rooms

Is your dream rec room filled with a great sound system and comfortable listing area? Maybe it’s filled with instruments, music stands, and recording equipment? Pinterest has a selection of music room decor and design ideas to make the music lover or music maker in your life drool!

Media Room Rec Rooms

Is your ideal relaxation space less of an activity room and more of an ideal viewing space for movies, tv, and sporting events? Consider creating a dedicated media room. Start with a surround sound system, a large screen, and comfortable seating and build from there! Not the cheapest of makeovers, but a media room can make your home THE entertainment destination for all your family and friends. HGTV.com has some great media room designs, as does Houzz.com.

Smaller Projects Rec Rooms

Maybe you’re not ready for a whole rec room design or makeover. Hometalk.com has some smaller project examples(before and after photos galore!) that can spiff up your existing fun space and make it fresher, friendlier, or just more fun! Pinterest is a great place for finding photos, links, and ideas for rec room projects both small and large.


Photo Credit 1   Photo Credit 2 & 3

Filed Under: Homeowner Info Tagged With: DIY Home Design Ideas, Rec Room Ideas

8 Budget-Friendly Indoor Halloween Decorating Ideas for your home

October 7, 2015 by The Columbus Team

15085460954_8a302e8e6a_k

It’s time to start thinking about decorating your home for Halloween! Whether you’re throwing a party and decorating to the nines, or just celebrating the season and spooking it up a bit, there are so many great ideas for creepy decor that fit anyone’s budget and get you in the spooky spirit! Here’s 8 budget-friendly Halloween decorating ideas for your home!

  1. Candles. Beyond the creepy factor of wavering candlelight, you can make striking decorations with inexpensive additions to items you may already own. Partially fill a straight vase, hurricane, or small glass jar with candy corn, tiny gourds, water with red food coloring, or wrap them in colored paper with a black design drawn on it and add a candle for a lovely centerpiece or the beginning of a mantle or table scape.
  2. Jack-o-lanterns. If you tire of the same old pumpkin faces year after year, try adding red tacks for eyes and filling the open mouths with plastic vampire teeth. Bored with jack-o-lanterns altogether? Make a sticky glaze of one part white glue to 1 part water and paint it on pumpkins or gourds, then sprinkle glitter or confetti to give your gourds some bling. Glue bat wings or plastic bugs on these old-school favorites to give them a new look. Add some contrast to a bowl of gourds or squash by using poster paint or acrylic paint to coat a few to add a pop of color (black or white look great).
  3. Window decorations. Paint autumn leaves white, and draw ghostly faces with black marker, then hang with ribbon or tape into place anywhere you want a little ghostly action! Use white glue and food coloring to create translucent window “clings” in the shape of bloody handprints or drips of blood…they’ll peel off when it’s time to clean up.
  4. Spiders galore. You can cut out spiders and spider webs out of black construction paper or even black garbage bags and hang them around the house. Buy a bag of cheap plastic spiders (and snakes if you like) and tuck them into flower arrangements, stick them with double sided tape onto candles or lamps, or use Contact brand adhesive strips to attach them to walls and doorways for a truly creepy-crawly look! Have some cheesecloth stuck in a kitchen drawer? Use a toothpick and scissors to tatter it and move the threads around to create a realistic cobweb, perfect for draping a lampshade or adding ick to a door way or picture frame! You can even make small spiderwebs out of bobby-pins, paint, and string!
  5. Balloons. Forget the expensive mylar balloons with pre-printed designs, make your own! White, cream, yellow, and orange balloons and a permanent black marker are all you need! Take white balloons, insert a green or yellow glow stick, inflate, and use your permanent marker to make a spooky ghost face…you’ll have a glow-in-the-dark ghoul in no time! Use cream, orange, and yellow balloons and add happy or scary jack-o-lantern faces. Hang from the ceiling, light fixtures, curtain rod, or just arrange them on a table top!
  6. Silhouettes. Download and print some spooky silhouettes and place in family photo frames over the original photo for a quick holiday update. Make larger silhouettes out of black garbage bags or plastic table covers and tape carefully across windows for a spooky look inside and out. Use tiny silhouettes to tuck into glass hurricanes or clear jars and add electric candles for a ghoulish glow.
  7. Tablescapes. Looking for a creepy place setting for a party or for the kids’ dinner before trick-or-treating? Touch a red permanent marker to a white paper napkin (or drip red kool-aid) and use vampire teeth as a napkin ring! Paint toilet paper tubes black, then cut scary eye designs with an Xacto blade, insert a glow stick and tape the ends with duct tape and you’ll have creepy glowing eyes to tuck amongst your table decorations. Create name cards or creepy fortunes by using holiday paper or torn parchment and rolling into a scroll, tying with black or orange ribbon. Looking for pretty table ideas? Apothecary jars or canning jars of differing sizes filled with colorful Halloween candies makes a tasty and welcoming centerpiece.
  8. Ornaments. Create hanging bats or cats from black paper or craft foam, add eyes for humor or leave plain black for a creepier look, and hang from string, branches, light fixtures, or mantels. Use orange paper for jack-o-lantern shapes, or white for ghosts. White ping-pong balls, or painted white inflated beach balls can be transformed into eyeballs with paint or markers.

We hope you get some spooky inspiration from our 8 budget-friendly Halloween decorating ideas for your home!  If you have any ideas you think we should add, let us know on facebook! Happy Haunting!


Photo Credit

Filed Under: Homeowner Info Tagged With: 8 Budget-Friendly Indoor Halloween Decorating Ideas

Outdoor Decorating for Halloween: Spooktactular Curb Appeal!

September 30, 2015 by The Columbus Team

outdoor-decor

Bags of bite sized candies and loads of orange and black decorations have hit the stores, so it’s time again to consider how to approach your outdoor decorating for Halloween to increase your home’s spooktacular curb appeal! Choose the amount of effort and money you want to invest in celebrating one of America’s favorite holidays. You can DIY your decorations or visit your local home improvement, department, or party store to purchase all kinds of Halloween decor for outdoors, much of it can be carefully stored for re-use year after year. Whether you go for the simple, easy, low key decor, or you go all out Halloweentown for the holiday, we have some great decorating ideas and links to examples and directions to DIY! Whatever your level of Halloween spirit, you’ll love these outdoor decorating ideas!

Simple swaps.

The easiest way to decorate for Halloween is to swap out a few of your annual autumnal decorations for holiday versions. That beautiful selection of mums in the flower bed gets bedecked with handmade mohair webs (or cute commercial ones from the grocery store seasonal aisle) and plastic spiders. Trade your autumn leaf and sunflower wreath for a spookier wreath that will thrill trick-or-treaters! How about an orange and black ribbon (and a plastic bat or two) to spiff up your mailbox? Slip a few Jack-o-lanterns into the pumpkin and gourd display on your front porch and you’re ready for the holiday!

Definitely decorated.

Simple swaps are nice, but do you want to go a little further? Take advantage of the easy swaps, then step it up a notch. Try adding silhouettes made of black paper or black garbage bags to your storm door, windows, and even your landscape uplights! Ghost ornaments are easy to make, whether they’re the full sized gauzy ones affixed to the porch columns or the tiny handkerchief variety haunting your favorite bushes or tree. Jack up your Jack-o-lanterns with zombie style or interactive details. Put the final touch on your spooky curb appeal when you visit your local home improvement or department store and pick up a string or two of holiday lights. Choose creepy eyeballs, grinning mini jack-o-lanterns, or glowing witches on brooms…there’s a light for every spooky-fun Halloween theme!

Frightfully fabulous!

Ever wanted to go hog-wild for Halloween? Go for it! Be the owner of the house that thrills the trick-or-treaters, wows the neighbors, and get the maximum Halloween bang for your buck!

If you’re wanting more even after all the simple and moderate decorating ideas, go for the wow-factor! Drape webs or spanish moss over your home, trees, and bushes. Giant spiders or bats crawling on your home? Ick! Add a graveyard to your front yard…you can customize the headstones to be funny, ironic, historic, or just plain frightening! Get fancy and include a fence, or go old-school and allow visitors to explore. Eek! Create a creepy cauldron with dry ice and glow-sticks, decorated with spanish moss or even a rubber hand. Swap your landscape lightbulbs with colored bulbs: Green creates a monstrous glow, red is bloody creepy, and blue can cast a boo-tiful light on all your decor. Life sized figures are especially creepy and scary, whether you create a whole haunted house scene in your garage or you have them simply lounging on your porch rocker…every visitor wonders if they’re going to leap to life! Use outdoor speakers to add audio and offer spooky background music!

Whatever your outdoor decorating level, The Columbus Team wishes you and yours a very safe, fun, and happy Halloween!

Photo Credit

Filed Under: Homeowner Info Tagged With: Outdoor Decorating for Halloween

  • « Go to Previous Page
  • Go to page 1
  • Go to page 2
  • Go to page 3
  • Go to page 4
  • Go to page 5
  • Go to Next Page »

CALL  |  EMAIL  |  VISIT

(614) 888.6100 Homes@TheColumbusTeam.com
100 E Wilson Bridge Road
Worthington, OH 43085

Connect with Us!

Facebooktwitterpinterestlinkedinyoutube

Question or Comment?

Search our Site

Angie's List Certified Badge
If you have a disability and are unable to access our site, please contact us at 614.888.6100. We will be happy to make all information accessible in any format necessary.
All information is deemed reliable but not guaranteed.
kw Capital Partners KELLER WILLIAMS logo
Sue Lusk-Gleich & The Columnbus Team Badge
  • Home
  • Blog
  • Ultimate Guide to Buying a Home in Columbus, Ohio
  • Why We’re Different
  • Our Team
  • Privacy Policy

Copyright © 2021 · The Columbus Team

Copyright © 2021 · The Columbus Team on Genesis Framework · WordPress · Log in